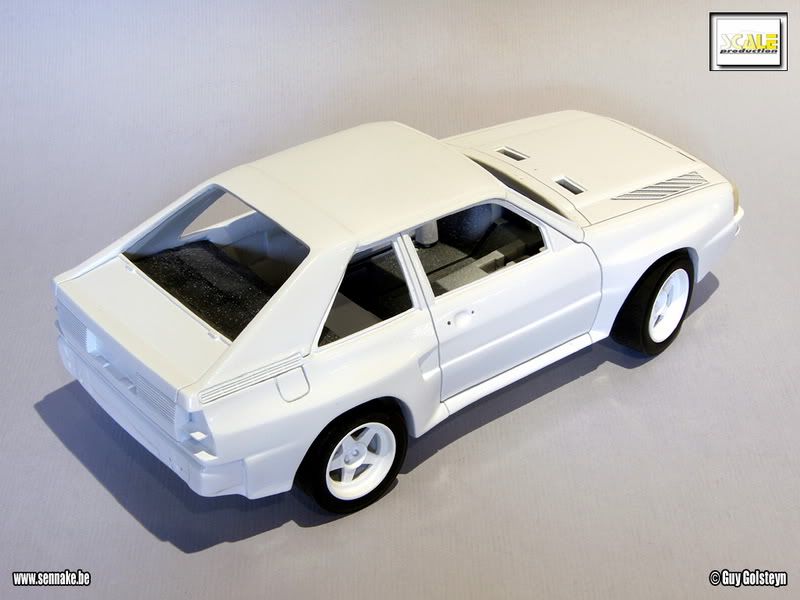
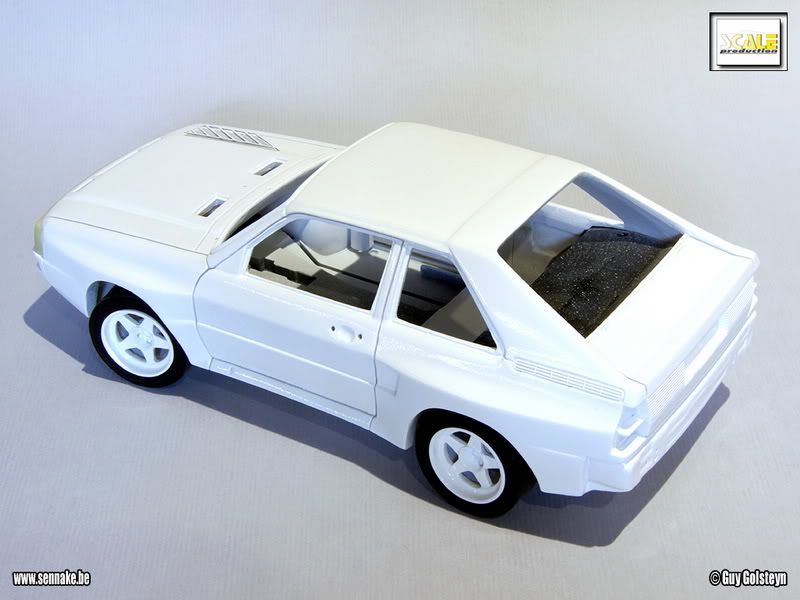
It has been a long time since I built a rally model. So I decided to start working at the iconic 1985 Audi Sport Quattro that has been built a few times already inhere, so I'm up to a pretty tough competition

This is the car that I'm going to build (for those who have been on Mars the latest 30 years):


Of course everyone inhere knows the Scale Production transkit (thanks Mike!) so it's needless to say you need a Tamiya Audi Quattro donor kit.
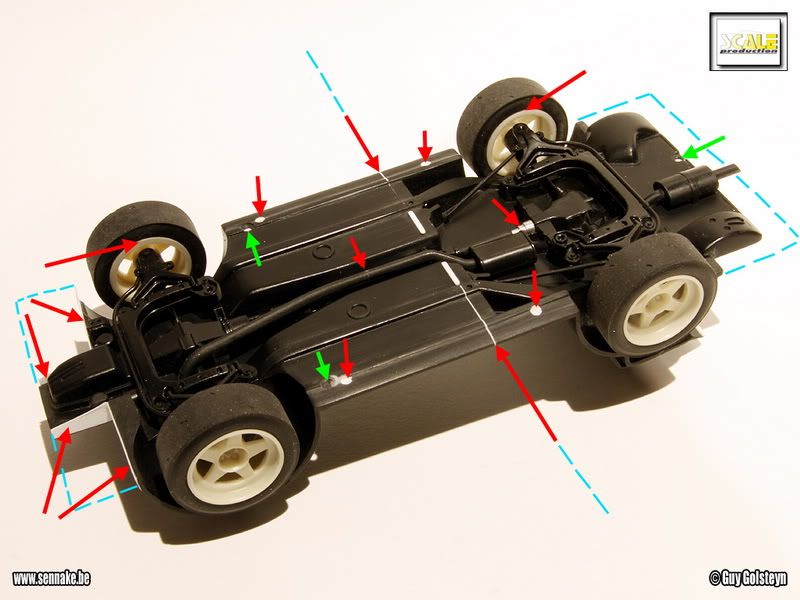
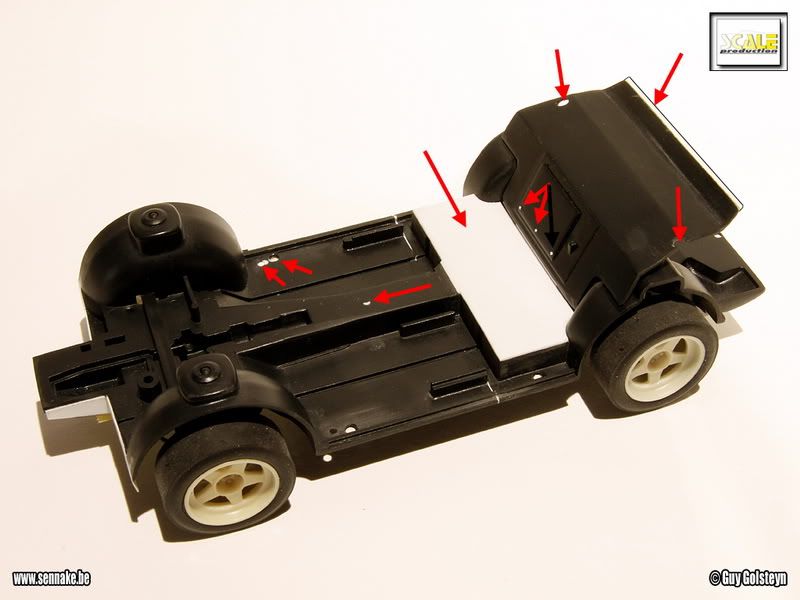
I decide to start with the chassis, that needs to be shortened (how original!
) So I shorten the Tamiya chassis by 16mm (not 19mm!). The blue dotted line with the red arrows points out where I cut the chassis. I was just a little bit to enthousiastic, because I had to use some plastic sheet to fill up the gap between the 2 chassis halves. That is where you can see the white lines.
I also had to cut away some chassis parts at the front and rear end of the Tamiya base, indicated by the other blue dotted lines.
On top of that I shortened the drive shaft (not visible on the picture) and the exhaust with 16mm. The drive shaft of my Tamiya kit missed a small part (probably broken) so I had to replace it by some aluminium tubing. The exhaust was shortened at a spot where it was straight.
The resin rims are about 1mm to wide to fit the included tires. So either you search for fitting tires (the Tamiya Celica tires seem to fit well) or you adapt the resin rim width. I chose to do the latter. I put the rims on my Dremel and cut them to scale. Two resin axles didn't survive this operation, so I replaced them by Evergreen plastic rod.
The green arrows point to the spots where the adapted chassis is fixed to the body, so I drilled out fitting holes. As you can see on the picture, I had to relocate a hole because I forgot about the safety roll cage. I had to adjust the hole before I could locate the roll cage. The white circles point out where I drilled out the chassis to fit this cage. Once it fitted I closed the holes again with Evergreen punched plastic sheet.
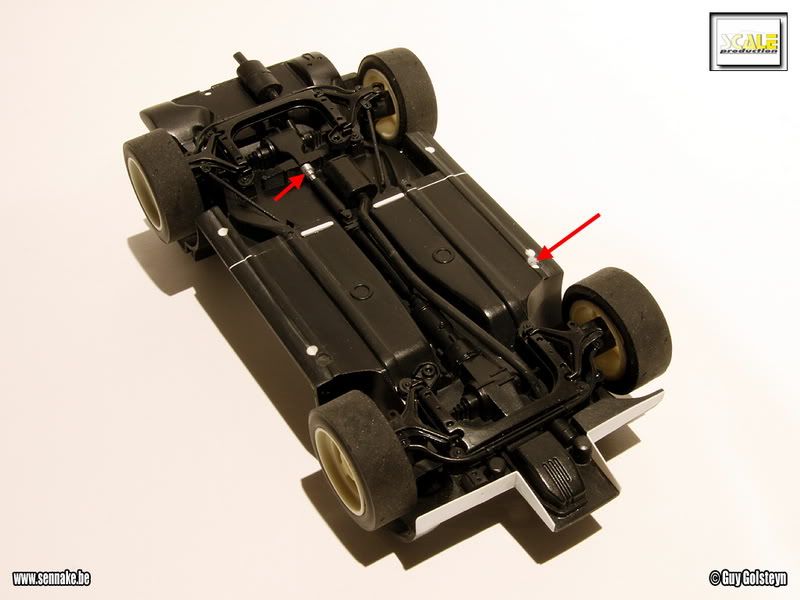
Here you can see where exactly I cut the drive shaft and the exhaust.

And here you can see where I screwed up the hole for the connection screw, which I had to adapt. The drive shaft which was missing a piece was completed with aluminium tubing.
At the interior I closed up the central tunnel and I removed all the connection pins. At the rear I fixed a piece of plasticard (in the kit) to cover the aera behind the seats. I had to replace the 3 white bolts because they were disappeared due to the sanding. I also drilled 2 holes in the rear part to fit the roll cage in. At the back I cut a part of the chassis because it didn't fit the body; next I added a piece of plasticard again to make it fit perfectly.
Next I dryfitted the roll cage.
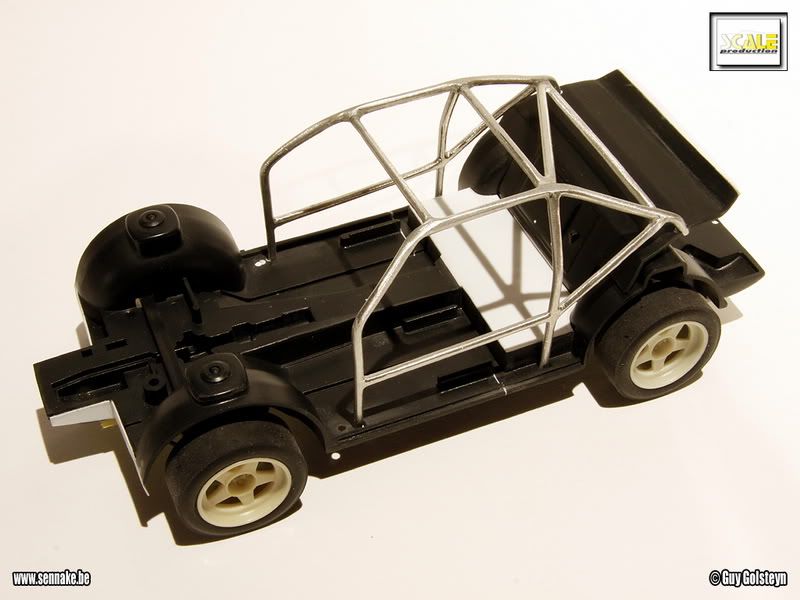
Even with the body in place the roll cage sits ok.
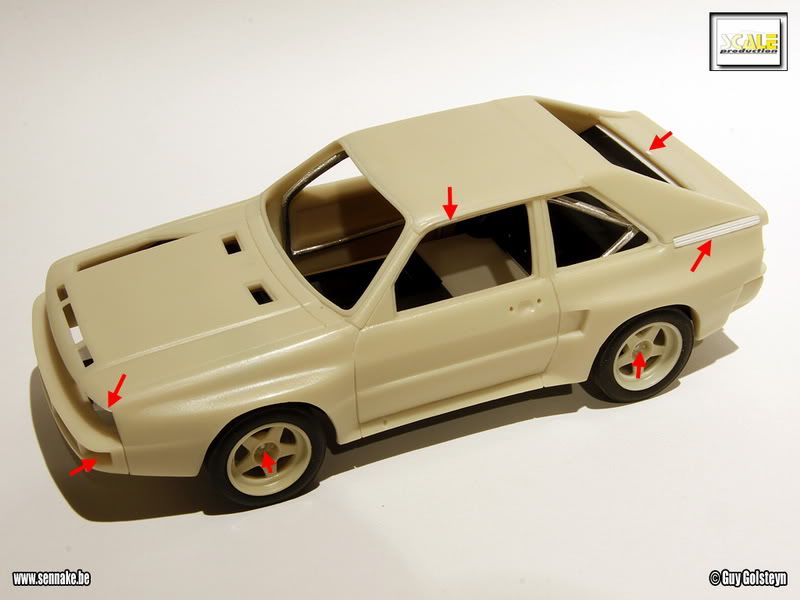
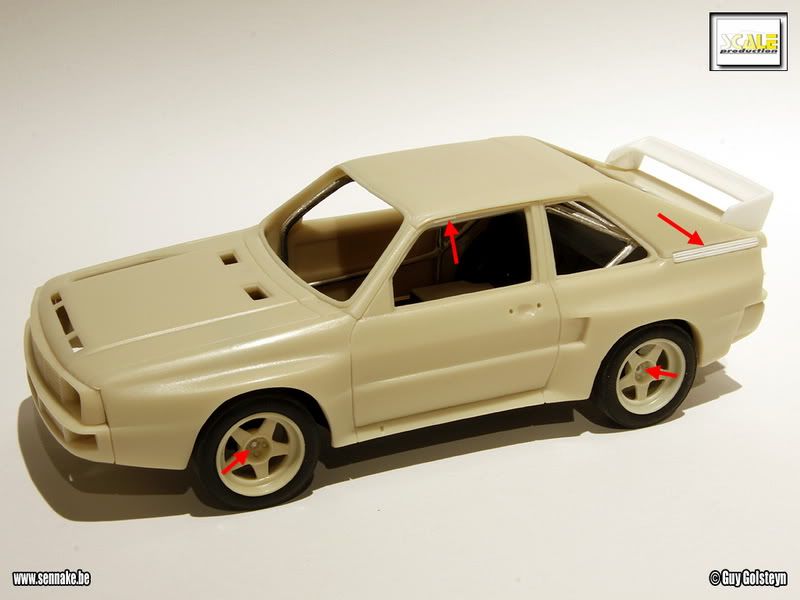
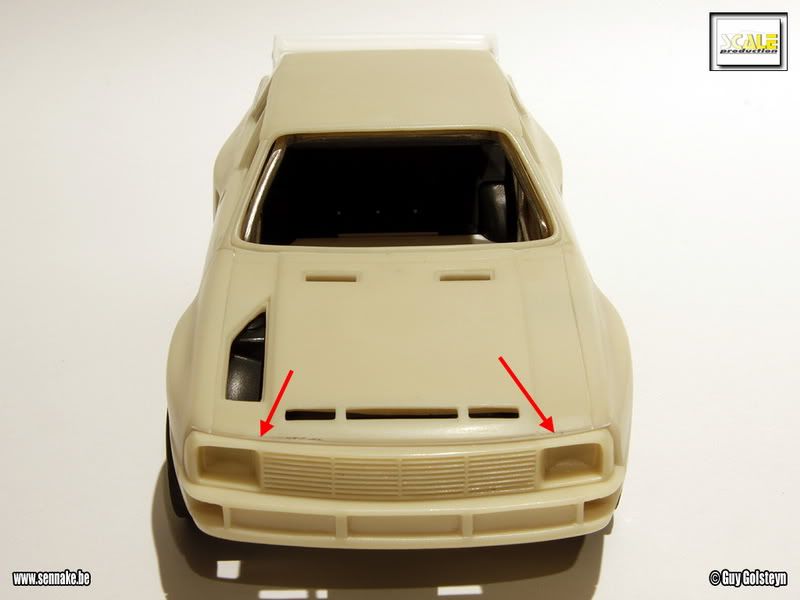
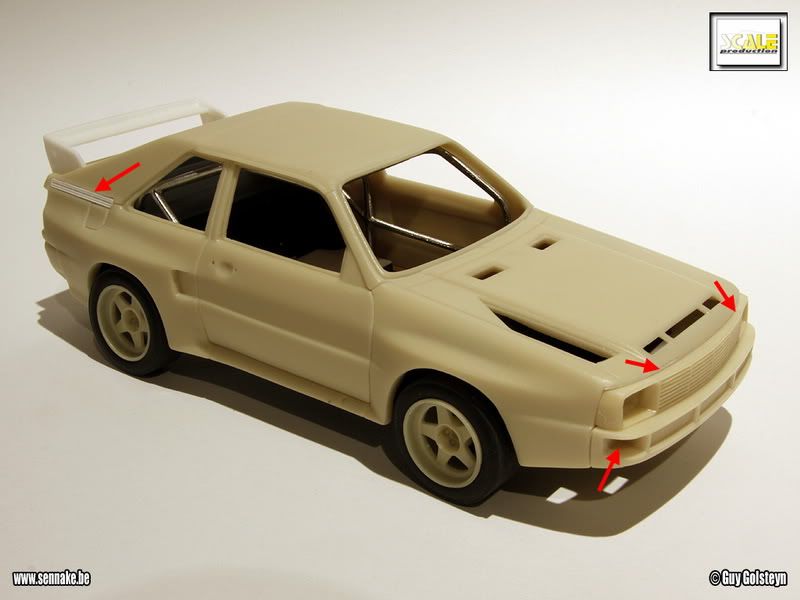
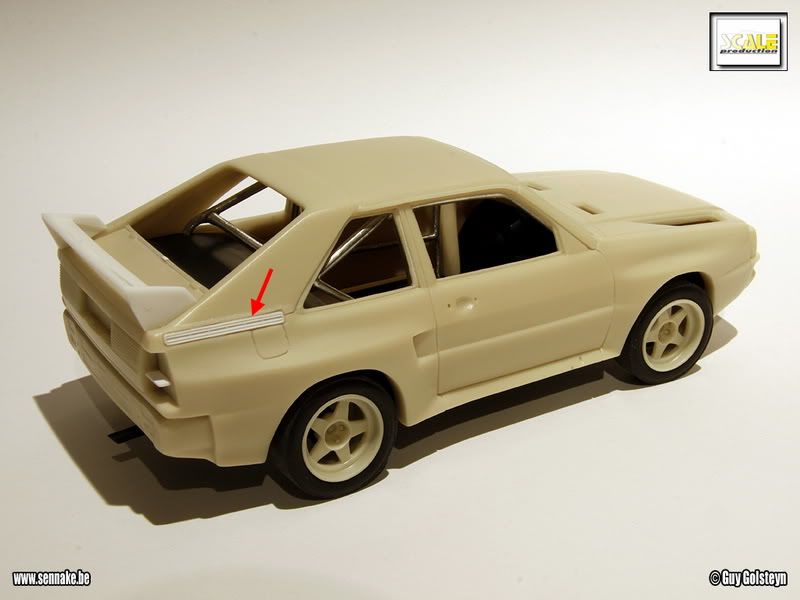
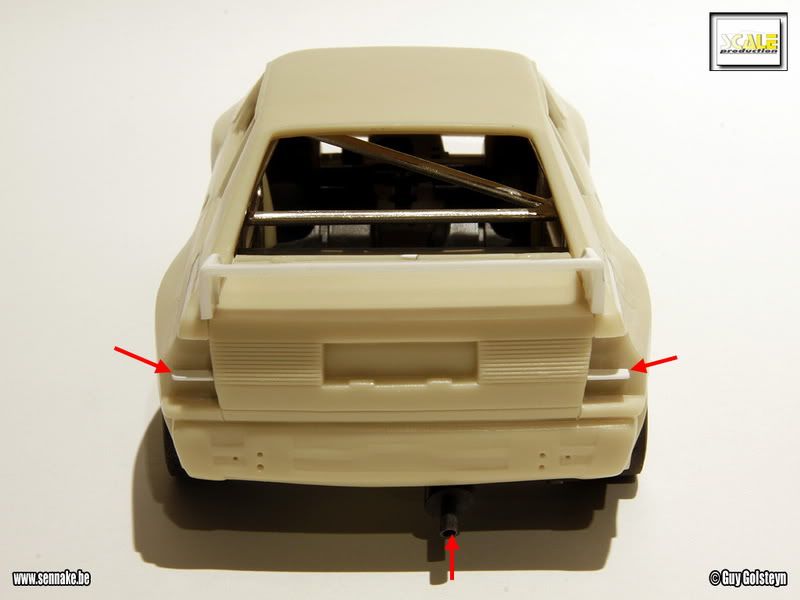
I also had to adapt the body nose part: the radiator part, which is separately in the kit, doesn't fit closely to the nose. To improve this I used a piece of plasticard which sits against the top of the nose opening, after which I filles up the remaining area with superglue and flower. I also had to do the same thing with the opnenings for the blinkers. Here and there I had to adjust some resin parts with plastic strip as well. For instance, the cooling ribs at the Audi's rear (left and right) were not very crisp anymore (which is normal with resin) so they have been replaced by the cooling ribs of the plastic donor Audi.
The left side rims are those at which I had to replace the axles. Since I damaged the rim while drilling I also had to replace the central bolt by a piece of plastic.