Lieber Besucher, herzlich willkommen bei: Das Wettringer Modellbauforum.
Falls dies Ihr erster Besuch auf dieser Seite ist, lesen Sie sich bitte die Hilfe durch. Dort wird Ihnen die Bedienung dieser Seite näher erläutert.
Darüber hinaus sollten Sie sich registrieren, um alle Funktionen dieser Seite nutzen zu können.
Benutzen Sie das Registrierungsformular, um sich zu registrieren oder informieren Sie sich ausführlich über den Registrierungsvorgang.
Falls Sie sich bereits zu einem früheren Zeitpunkt registriert haben, können Sie sich hier anmelden.
Starsky and Hutch Ford Gran Torino
Hallo,
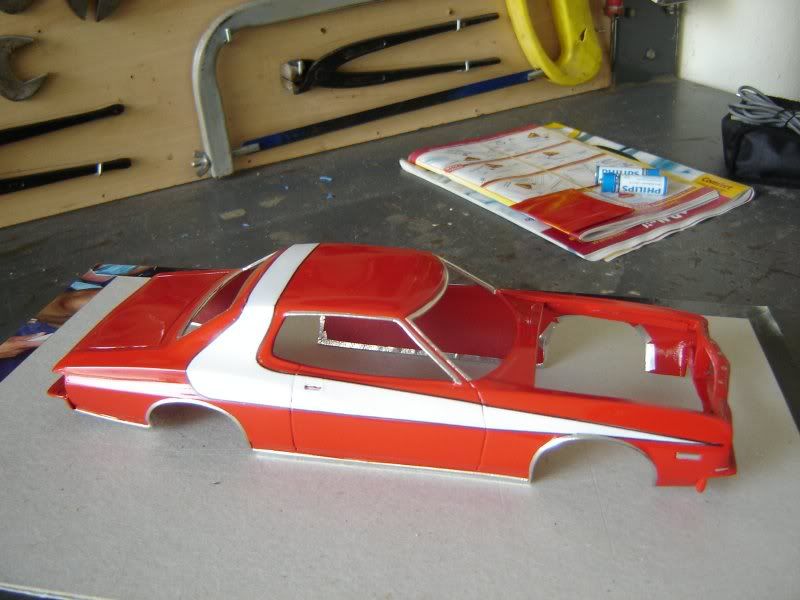
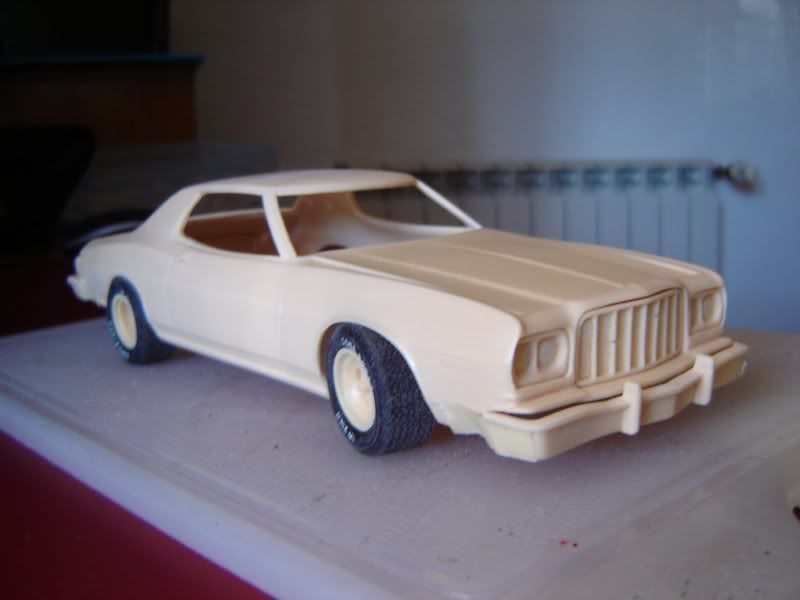
This is my latest build, the famous 1976 Ford Gran Torino from the TV Series Starsky and Hutch. I bought the resin body and some parts from Model Car World and also the Revell 70 Ford Torino to complete the chassis and interior. The body is not perfect but is the only we have in 1:25 scale, so I put my hands on it and these are some pictures of thew work I made so far.


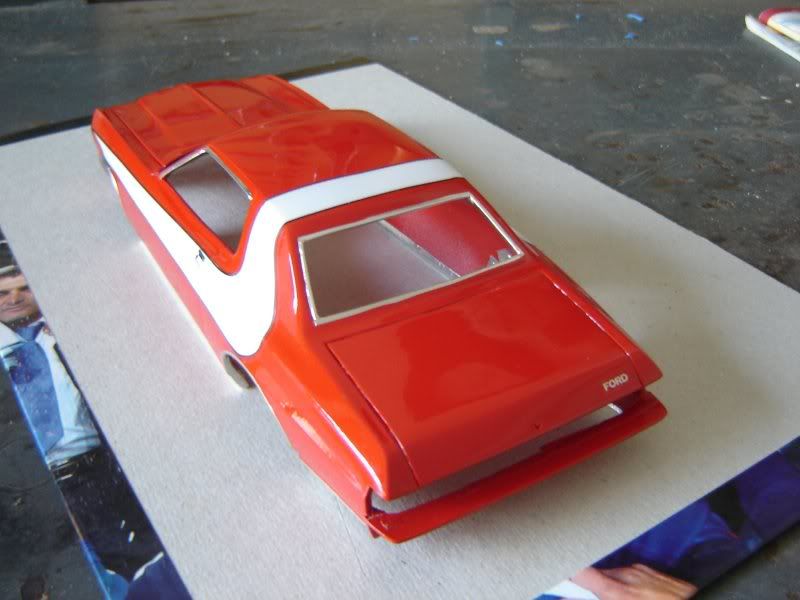
After the paint job..

After aplied the decals I made in my computer..


More to come...
Hi Charger,
nice project, I like the Gran torino very much.
lucky man to have this!!!

the paintjob looks very clean so far, this will be a very unique model!
good paintjob  is it true?
i read in a other board :"The "´70 Ford Torino" should be the right for donor, BUT THAT IS WRONG! You need a rare 1972 Ford Torino Promo-kit which shows up on Ebay from time to time!" is it true?
is it true?
i read in a other board :"The "´70 Ford Torino" should be the right for donor, BUT THAT IS WRONG! You need a rare 1972 Ford Torino Promo-kit which shows up on Ebay from time to time!" is it true?
Laas
(sorry 4 my english )
Thank you for the replies!
Druckdose, you are right! But the 72 kit is rare, so the only kit I had for the donor is the 70 Torino. I made a research on the web and all the people said that the 70 torino is the one pretty close.
It need some modifications but with patience and work, I´ll make this right, I think!
i belive it works

i wait 4 an update
laas
Holy sh** .... looks great !
lots of pinholes that had to be filled to achieve that smooth paint
How did you make these decals ?
first with a piece of paper and some scanning ?
Do you use an ALPS-printer or is it white decal paper ?
Grüße aus dem "Wilden Süd-Westen"
Markus
"When all else fails ... Read the instructions" ( LINDBERG 1965 )
Youth, talent, hard work, and enthusiasm are no match for old age and treachery !
( In memoriam Prof. John A. Tilley, † 20.07.2017 )
Hello Joaquim

,
the body looks very nice

. Will you blacken the door cranks? I think it would be more realistic.
So long
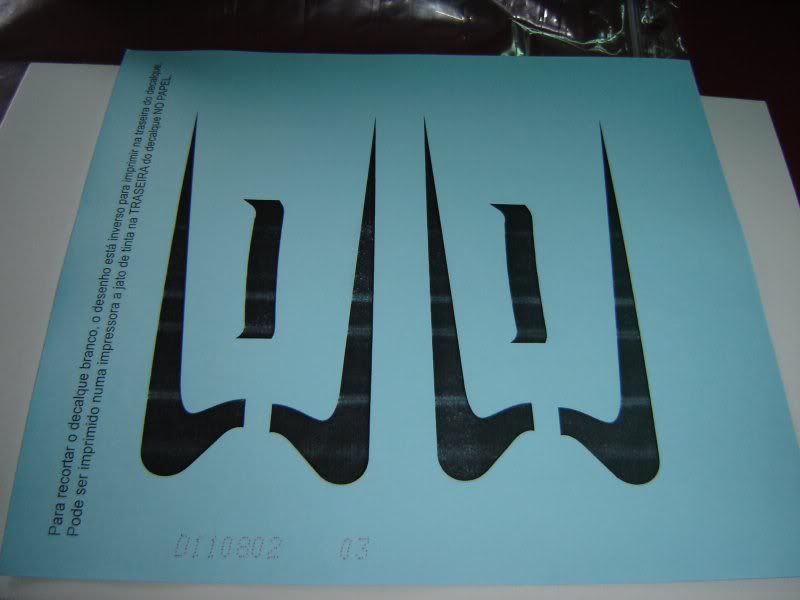
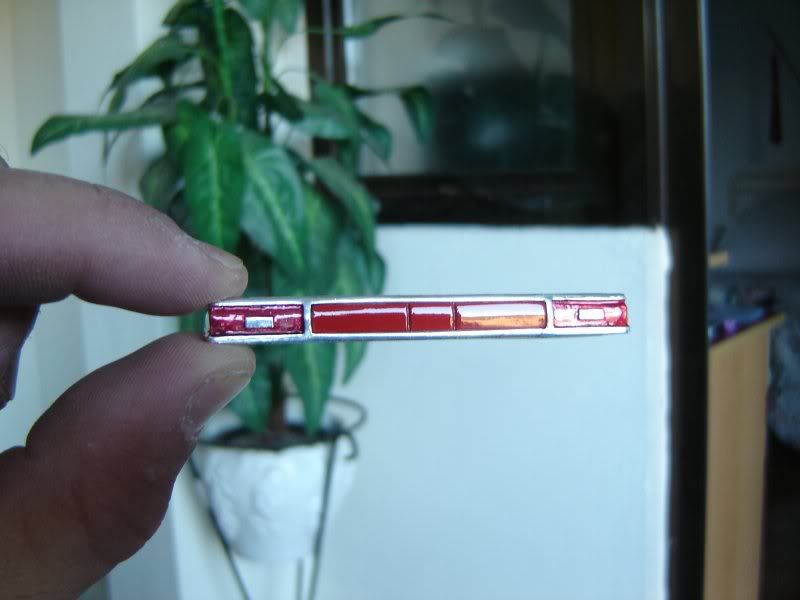
Showrodder, I made the decals on my computer in PDF file, then I bought 2 decal sheet, one transparent and one white. I print the white stripes behind the white sheet and the black stripes in front of the transparent decal sheet. All of it into laser print.

Dagmar bumper, yes I will paint the door cranks. Thanks both of you!
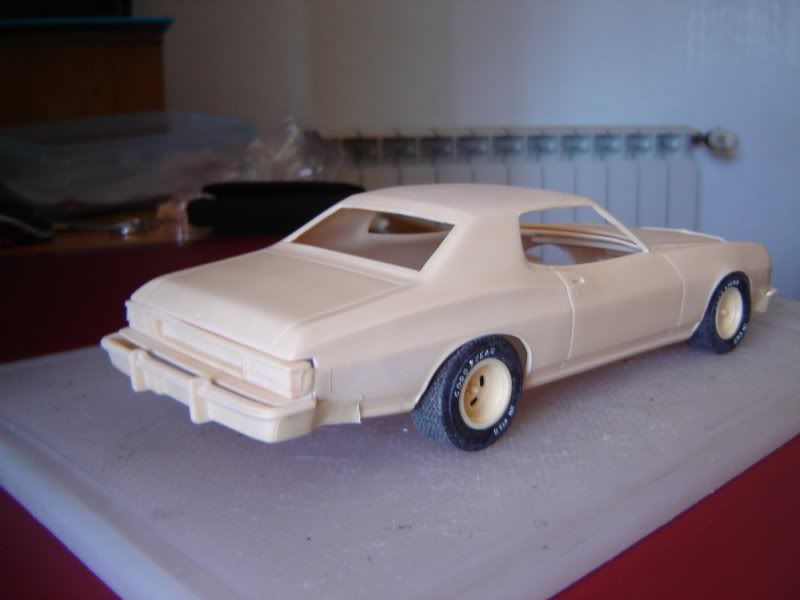
Some progress..

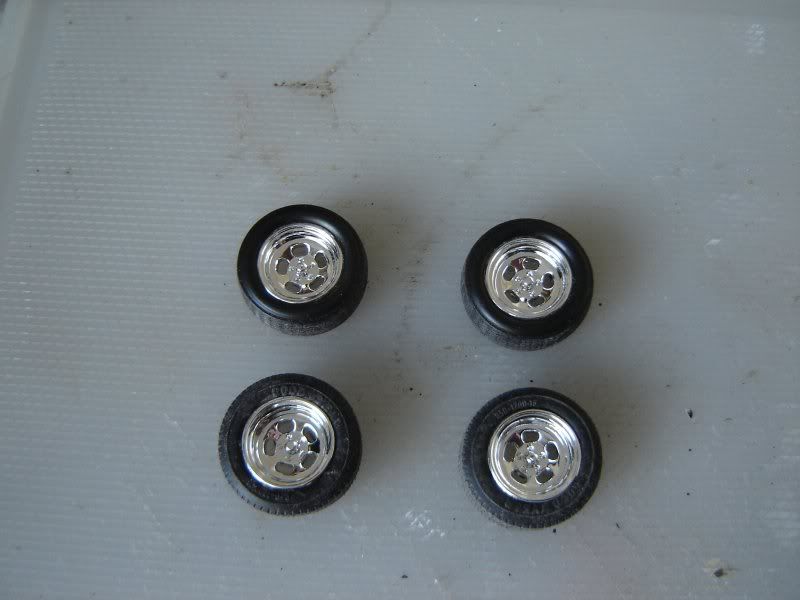
The original wheels that came with the resin body are right but I bought new ones (Revell 55 Chevy). They are more realistic, I think!
Hi Charger,
Your Torino is awsome.
Its a nice Model.....
Greets Kai
Looks great so far
Micha
@Joaquim
thanks for the answer ...
do I understand that right that you printed on the backside of the white decal sheet to have the pattern of the white area ?
then you cut the outline from behind ?
And the transparent decal sheet is printed from the front ?
Then you had to align the both decals on each other ?
... wow what a lot of work ...
but it looks fantastic !
what was wrong with printing the black outline on the white sheet ?
why did you make double the work ?
There is nothing wrong with that ... I just want to know it ... and maybe I can learn a new way of decal design ...
One last question ... where are you from ? ... I noticed the spanish instructions on your decal sheet
Grüße aus dem "Wilden Süd-Westen"
Markus
"When all else fails ... Read the instructions" ( LINDBERG 1965 )
Youth, talent, hard work, and enthusiasm are no match for old age and treachery !
( In memoriam Prof. John A. Tilley, † 20.07.2017 )
Hallo Markus.
Ich habe das Decal-Problem so verstanden:
-im oberen Bild hat er die weisse Fläche von hinten (schwarz zum Ausschneiden )auf das Decalpapier gedruckt,
-im unteren Bild sind die schwarzen Streifen in unterschiedlichen Breiten von vorn auf das durchsichtige Decalpapier gedruckt.
Damit kann Er die weisse Fläche randgenau ausschneiden und bei den schwarzen Streifen ruhig etwas ungenauer schneiden oder absichtlich einen Rand überstehen lassen.
Grus Ralf
Showrodder, I´m from Portugal.
Gauloi said and very well what I´ve done with the decals. I print behind the white decal sheet because when I cut it, I can cut smaller or bigger.
Alright,sir!